Close
We'll Be Back! Temporary Closure - Inventory and Website Maintenance.

hotcoldIf the topic of laundry fascinates you as much as it does us, make sure you check out our other Laundry Science posts!

C’mon, Baby, Do the Swish
Water Quality – Soft, Hard, or Somewhere In Between
Length of the Wash Cycle (Sometimes a Quickie Isn’t Enough)
The Role of Water in Washing Cloth Diapers
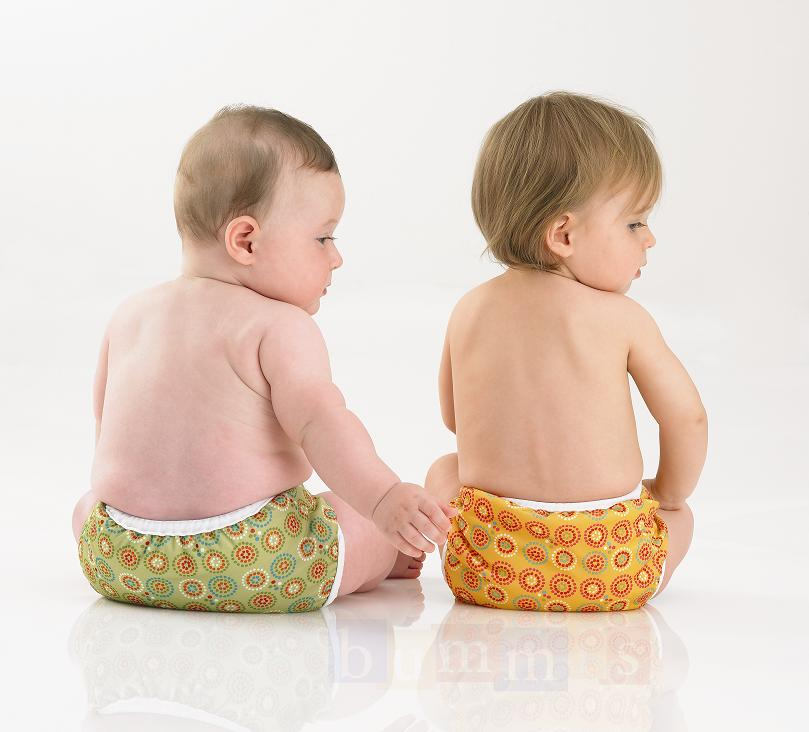
Today's post in our Laundry Science series is about the temperature of your wash water. Some may argue that cold water is best for environmental reasons, while others declare that hot water is required for diapers. And a common question at our Cloth Diapering 101 workshops is whether or not it's required to use the extra-hot sanitizing cycle for diapers. What's the real scoop? How does temperature affect the cleanliness of the load - and getting out stains? First off, we should make sure we're all familiar with the basic wash routine for cloth diapers - a rinse on cold, wash on hot, and rinse on cold. (We know, we know - for most readers, this is de rigueur, but we just like to make sure everyone's on the same page.... :-) ) Of the three temperature settings available on most washing machines - cold, warm, and hot - each has its particular role and effect on your diapers. For example, cold is great for just getting plenty of water through your diapers while offering good environmental and budgetary savings, but if you're wanting to get a fresh batch of stains out, you might want to change the first rinse to warm. Why? Because it's recommended to remove a stain at the same temperature at which it was set, so for ice cream stains on a shirt, you'd want to use a cold rinse, but for diapers, you'd want to use warm, since they were created at body temp! Also, keep in mind the temperature at which your water heater is set, as your hot wash will be at that temperature. (Although also keep in mind that the water may come out 2-4° Celsius cooler than what your water heater dial says, depending on how much pipe the water has to go through in its travel between the water heater and the washing machine.) Many detergents activate most efficiently between 55-60° C (130°-140°F), including Rockin' Green, which is also the range at which most bacterias are killed, which is why it's recommended to use a hot wash to clean your diapers. But what about the sanitize cycle, which super-heats the water above 65°C (150°F)?  There are a few factors that come into play here. One, this high temperature tends to weaken synthetic fabrics, including PUL and elastics, so it's definitely not recommended on a regular basis and may even void your warranty. (Check out the BumGenius site as an example.) It also adds a significant amount to your energy usage for washing diapers, which adds up on your monthly bill. The only time we recommend a one-time extra-hot sanitize wash is if your child has had a serious bacterial diarrheal illness, such as rotavirus, or a severe, prolonged yeast infection. Even then, check with the manufacturers of your diapers before you do a super-hot wash if you're worried about your warranty, as there are other ways to deal with lingering spores as well. If you're interested in finding the right balance between getting a good hot wash and not scalding yourself (and your children) at the sink, check out these tips from the City of Vancouver and BCHydro for saving money and making your heater more efficient.

Photo Credit - HunterxColleen

0 Comments | Leave Comment
Today our featured mom is Pamela. How old are you? 28 What did you do (from a working perspective) before your baby arrived? I work as a medical/surgical LPN. Are you currently at home with your baby/children or working in/out of the home? Home with my daughter How old is your baby? 3 months When did you decide to cloth diaper? Many, many years ago. As long as I can remember I have planned to cloth diaper my children. When did you start cloth diapering? 2 weeks after Claire was born What is/are your favourite diaper(s)? Right now I love my Micro Doodlez. Very trim on my 10-lber, nice and absorbent. The only downfall is that they take sooo long to dry! (Hey Pamela - have you considered Easy Fits - they offer that same great trimness AND a much reduced dry time!) My day in a nutshell 8:30 am - Claire starts fussing, I roll over and nurse her trying to get her to go back to sleep...I'm not much of a morning person, so this is how most mornings start. She starts kicking and cooing after she is done eating, so I know I'm done for....Time to get up! We head into the nursery to change and dress her for the day. Today is BootCamp day, so I get dressed in my workout clothes and brush my teeth while she plays on the bed. 9:10 am - Alright Monkey, your turn! Diaper change...EEK! Guess I didn't get the new diaper on quick enough and she peed everywhere. She thinks it's hilarious when she does that, full of smiles! Clean her up, new diaper on. Reach for the clothes, and hear the unmistakable sound of a full diaper....I turn to her, and with my cutest baby voice "You've GOT to be kidding!" I don't mind though...It's moments like this that I'm glad I use cloth, so I don't care if a diaper is only worn for a minute....Just get to pick another cute one! 9:30 am - We go downstairs, Claire spends a bit of time in her swing while I have breakfast and get us packed for the day. 9:50 am - We head out the door for some Stroller bootcamp. Time to work off the babyweight! 11:30 am - Home from bootcamp, thank goodness it wasn't raining today, and Claire napped through! Feed & change Claire, and then she spends some quality time with her bouncy chair while I take a shower. :) 12:15 pm - put Claire in the Ring Sling and start the laundry. Diapers go into the wash for a quick wash on cold, extra rinse, heavy soil, with one scoop Funk Rock 12:30 pm - Claire isn't liking the sling today, so she goes into her exersaucer/jolly jumper while I put on the coffee and make some lunch. 1:15 pm - Nap time! Nurse Claire to sleep in the sling, and turn the diapers on for their wash load.  Heavy duty, Heavy soil, Hot/cold, extra rinse, with two scoops Rockin Green Classic. Sit and enjoy coffee while Claire naps. 3:20 pm - Claire starts fussing, nurses a little, and then dozes off again. 3:40 pm - Yay, DH is home!! He puts the diapers in the dryer for me, low heat, sensor dry. 4:00 pm - Claire is up for good....Hand her over to DH for some Daddy-Daughter time while I make supper. 5:00 pm - she's hungry again....Nurse her, then feed myself! 6:00 pm - DH is going to be out for the evening, so they enjoy a bit more quality time while I have some quality Mommy time and fix her bibs! I spend some time sewing some snaps onto them, as they are all too big for her skinny neck and the drool just skips them altogether! 7:00 pm - Back on Mommy Duty. Claire feels warm, and has been pretty snotty and fussy all day....Temp of 101, bit of tylenol, nurse her to sleep, wrap her up in the Woven Wrap for a  nice cozy cuddly Mommy nap. 7:30 pm - Take the diapers out of the dryer, and realize they're kind of smelly....Ick! I've never had this problem before, so I do a bit of reading. Toss them all in the laundry sink with 4tTbls Rockin' Green.....we'll be rockin' a soak overnight. 8:30 pm - Up to bed, Nurse Claire to sleep while I read a bit, then doze off myself. Next morning.... Wow, I can't believe the water the diapers are soaking in is still warm! Toss them in the wash on Quick Wash, Hot/Cold to rinse out the yuckies. Half hour later, I do another hot/cold quick wash cycle with 4Tbsp. funk rock, and let them soak for an hour. Another quick wash, hot/cold, extra rinse, and into the dryer they go! Finally, 20 minutes later, they come out smelling fresh, cleaner than they've ever been!

This interview was submitted February 17, 2011.

0 Comments | Leave Comment

Organizing Your Line Drying System

Posted on

As the days are getting warmer and we enjoy the long summer days, it's easy to get inspired to line dry your diapers rather than rely on the dryer to do the work. The sunshine is great for your diapers, you can save money, and there are many ways to make the task work for you.

Inside or Outside?

Whether you choose to dry your diapers inside or outside doesn't matter - they dry equally well. When you dry your diapers outside, they get the benefit of the UV "bleaching," but they also can become stiff if they are dried in the direct sun. Drying inside minimizes the "stiffness" factor, but can be slower to dry. Basically, the slower the drying time, the softer the diapers will be (not to mention fresh!), so if you're drying outside and don't need to benefit of the sunbleaching, either stick the diapers in the shade or double them up.

A Rack to Fit Every Family

A drying rack - There are many varieties of drying racks, which you can find at pretty much any retailer from IKEA to Amazon.com to your local hardware store. Some offer multiple rods on which to hang your diapers, while others offer "shelves" of a sort on which to lay items flat. The advantage of a drying rack is that they are completely foldable, making them a "must" in small spaces and very versatile for where you can use them. Here are just a few varieties to give you some ideas: (Please note, New & Green does not have any connection with any of the companies or individuals listed nor do we endorse any of these products specifically. These links are provided for the sake of illustration only.) Tall adjustable rack with folding shelves Metal folding rack Wood and vinyl folding rack Metal and vinyl folding rack with "wings" Sandwich-board style folding rack Upside-down "double-V" folding rack A clothesline -This very traditional way to dry clothes outside is a perennial favorite among line-drying enthusiasts. The plus is that there is nothing to store, but you do need to have sufficient space to string a line. A clothesline can be as simple as a heavy rope tied between two trees or two chairs or as complex as a pulley system with heavy-gauge wire. A stationary, swiveling clothes rack outside can also be useful, especially if you don't have many places to afix a line. Whichever system you choose will only be dictated by the space you have available and your personal preferences. And of course, creativity is the name of the game. Sometimes, especially when traveling, you just have to use whatever is available! (Click through to see how one clever mama made do in her family's hotel room - thanks to Flickr user medigerati for the wonderful photo.)  

Line Drying Accessories That Make the Job Easy

Clothespins - Clothespins (also known as clothes pegs) are extremely useful, especially on a clothesline. If you make sure you have them ready and handy, say in an old handbag hung on a hanger or in an empty coffee can you can move along with your feet, hanging your diapers will be a breeze (not to mention they won't blow away in a breeze!). Clothespins come in various materials - metal, wood, bamboo, etc. - and in a variety of styles - slide on, clip on, pinch-grip, etc. They're generally quite cheap - $5-6 for a couple of dozen, though obviously that will vary according to material. Spray bottle - a spray bottle is useful too when line drying. If your diapers are getting too "crunchy" while they dry or are drying too fast, spritz the diapers with a fine mist. This will soften the outside while the middle continues to dry. What are your preferences when it comes to drying your diapers "au naturel"? What has worked well for you?

Photo Credit - simplyla

1 Comments | Leave Comment
  As your baby moves from those tiny infant days to the big run-around toddler days, different size cloth diapers take care of all your cloth diapering needs. If you've chosen to use one-size diapers,  obviously you'll need to decide when to change the snap settings to get the best sizing at every step of the way. If you're at one of times, congratulations on this milestone in your baby's growth! Here are few things to watch out for to know it's time to change to the next snap setting: When the rise falls below the top of the hips, you know the diaper no longer comes up high enough to provide adequate coverage on the front of the diaper. The "rise" is the height of the diaper in the front - this often indicates the the back of the diaper is a bit short as well, so it's definitely helpful to extend the rise at this point by moving up one snap setting. When the leg openings become tight, that can also be an indication that the diaper is on the small side. Leg openings should be somewhat snug in order to keep messes where they belong, but if you can no longer fit one finger in between the leg elastic and your baby's leg or if the elastic is leaving significant indentations in your baby's skin, then it's time to re-evaluate. It should be noted, however, that tight leg openings can occur for other reasons, as well, so you should check out other fit issues before changing your snap settings. If you have a wonderfully chubby baby, the legs will probably become tight before the rise becomes too short, while if you have a long legged, lanky babe, the leg openings may never become too tight before it's time to switch. Tight leg openings are merely a companion symptom. (Leg openings should never gap, however, so look for a different culprit if changing the snap setting results in gaps around the legs!) However, if the diaper is tight around the waist and difficult to get on, that's a good sign that your baby is ready to move to the next snap setting. [caption id="attachment_3559" align="alignleft" width="288"]bumgeniusonesize bumGenius One-Size Guide[/caption] If pee regularly starts leaking over the top of the diaper, regardless of the rise, it may be time to change the snap setting. This can be due to a boy who tends to point upward or a girl who sleeps on her front - however, before you decide that changing snap settings is the best way to solve this problem, consider doing some "problem solving" by making sure to tuck your boy downward when you change him or by adding extra absorbancy to the front of your girl's diaper. The makers of BumGenius, one of the most popular one-size diapers on the market today, offer a helpful comment to keep in mind as well: Remember, babies change shape frequently as they grow up. You may have times when your relatively young baby is using their one-size diapers on the largest setting. The same child may be on the medium setting several months later due to increased mobility. FuzziBunz One-Size Guide Also, one extra note for those of you who use Fuzzi Bunz One-Size diapers: Even though Fuzzi Bunz's version of the one-size diaper uses elastic instead of snaps to change sizing, these guidelines still apply. However, the elastics allow more settings than snaps do, so you may choose to adjust them more or less often, according to what works best for you and your child. If you ever find yourself trying to find the "right" adjustment for your child, use this handy chart to find suggestions that may work for you. Here's the best to all you fantastic mamas as your child grows and hits many milestones in the first few years of life!
0 Comments | Leave Comment
Thanks to everyone who entered our contest last week.  The comments were read (everyone LOVES Vairdy's work!) and counted for a total of 63 entries. We randomly selected Chelsea as our Winner for the Photography Shoot and Krista as our Winner for the BabyKicks 3g Pack.  Congrats to you both! Come on back to our facebook page and post photos of your winnings - we'd love to peek! Stay tuned for more ways to get involved with N&G! PS - If you'd like to pick up a few BabyKicks 3g's of your own, we're offering you 20% off until August 5, 2011.  Use the code BK3gBLOG at the checkout for your discount to apply.
0 Comments | Leave Comment

Hear about sales, exclusive coupons & giveaways, new product releases, and helpful tips.