Cloth Diaper Pails :: How to Choose a Pail That Will Work for You
Posted on April 06, 2010
 Though words like “champ” and “genie” fill our lexicon when it comes to baby registries and diapering discussions, thankfully when it comes to cloth diapering, no specially-designed equipment is required.
Basically, all you need is a pail or a bag large enough to hold 2-3 days worth of dirties that has a way to close. Any mass merchandiser, house wares shop, or hardware store should have a variety of suitable pails or bins for just a few $$$.
So, here are a few things to keep in mind to help you choose the pail that’ll be most suitable for your family:
Where will the pail be in the house? Size matters. Come to think of it, shape matters too. A round pail or an rectangular flip top pail will each fit differently in different spaces. You could also forego a pail altogether and just use an extra-large hanging wetbag on a doorknob, a hook, or the end of the change table if you don’t have floor space for a pail.
Or have a mixture of both – keep a hanging wetbag in the washroom for the times you need to flush the poop and a diaper pail next to the change table for all the non-poopy changes. Change it up according to what works for you.
Is there more than one child in diapers? How big the container is matters too – especially if you’ve got more than one in diapers. Keep in mind that it just needs to hold as many diapers as you go through between laundry washes – 24 if you have only one child and wash every two days, 48 if you have two, etc.
Choose your lid wisely. The lid is an integral part of this system (or the zipper or drawstring on your hanging bag). A good closure not only keeps odours at bay while still allowing you easy access to the pail during a diaper change, it will keep you and your family safe and happy.
For example, if there are older children or pets who could get into the pail, a flip-lid can may not be the best option for you, while a plastic garbage can with locking handles to keep the lid on tight may be just the ticket. Also, if a large plastic tote with a very secure locking lid is frustrating to get into after every diaper change and thus doesn’t get used, a different type of pail may make your experience with cloth diapering much more pleasant. It all depends on your own family’s needs and preferences…
As with all things in cloth diapering, we hope this will help you figure out what works for YOU!
Though words like “champ” and “genie” fill our lexicon when it comes to baby registries and diapering discussions, thankfully when it comes to cloth diapering, no specially-designed equipment is required.
Basically, all you need is a pail or a bag large enough to hold 2-3 days worth of dirties that has a way to close. Any mass merchandiser, house wares shop, or hardware store should have a variety of suitable pails or bins for just a few $$$.
So, here are a few things to keep in mind to help you choose the pail that’ll be most suitable for your family:
Where will the pail be in the house? Size matters. Come to think of it, shape matters too. A round pail or an rectangular flip top pail will each fit differently in different spaces. You could also forego a pail altogether and just use an extra-large hanging wetbag on a doorknob, a hook, or the end of the change table if you don’t have floor space for a pail.
Or have a mixture of both – keep a hanging wetbag in the washroom for the times you need to flush the poop and a diaper pail next to the change table for all the non-poopy changes. Change it up according to what works for you.
Is there more than one child in diapers? How big the container is matters too – especially if you’ve got more than one in diapers. Keep in mind that it just needs to hold as many diapers as you go through between laundry washes – 24 if you have only one child and wash every two days, 48 if you have two, etc.
Choose your lid wisely. The lid is an integral part of this system (or the zipper or drawstring on your hanging bag). A good closure not only keeps odours at bay while still allowing you easy access to the pail during a diaper change, it will keep you and your family safe and happy.
For example, if there are older children or pets who could get into the pail, a flip-lid can may not be the best option for you, while a plastic garbage can with locking handles to keep the lid on tight may be just the ticket. Also, if a large plastic tote with a very secure locking lid is frustrating to get into after every diaper change and thus doesn’t get used, a different type of pail may make your experience with cloth diapering much more pleasant. It all depends on your own family’s needs and preferences…
As with all things in cloth diapering, we hope this will help you figure out what works for YOU!
0 Comments | Leave Comment
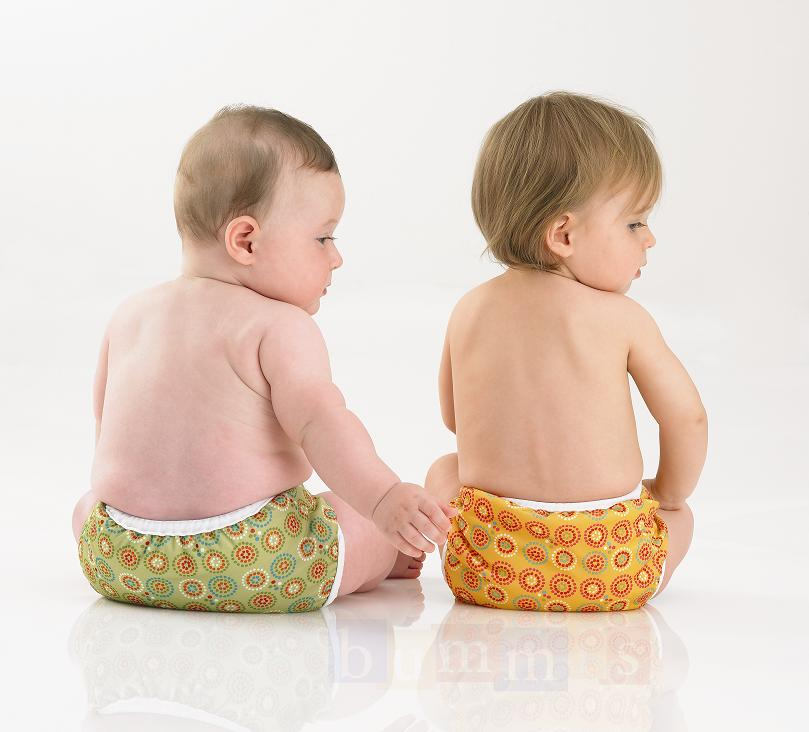
 Some may say that cloth diapering twins or multiples must be too much work. But never fear! It’s easier than you think – it’s just a bigger load of laundry.
All the same “rules” apply to cloth diapering twins that apply to singletons:
-count on about 24-30 diapers per child (+ 6 covers if needed),
-use a pail with a liner so you can just dump them in the washing machine without any other work involved,
-and wash every 2-3 days.
The only difference is that it might be a good idea to have a few extra diapers on hand to give yourself more wiggle room between washes – say closer to the 30 mark per baby. You might also want to make sure you have an extra-large diaper pail to accommodate the extra diapers (or two pails in two different locations…. feel free to be creative.) From talking to parents of multiples, we've learned that often twins (or more) are more on a routine schedule and may eat more regularly (ie every three hours) which helps to predict diaper changes more easily.
We also recommend choosing diapers that are easy-to-use and easy to have ready for diaper changes, just to keep life extra easy and to be extra nice to those who are giving you a hand with the extra baby care!
If you want a diaper that goes on in one step and doesn’t need a separate cover, check out
Some may say that cloth diapering twins or multiples must be too much work. But never fear! It’s easier than you think – it’s just a bigger load of laundry.
All the same “rules” apply to cloth diapering twins that apply to singletons:
-count on about 24-30 diapers per child (+ 6 covers if needed),
-use a pail with a liner so you can just dump them in the washing machine without any other work involved,
-and wash every 2-3 days.
The only difference is that it might be a good idea to have a few extra diapers on hand to give yourself more wiggle room between washes – say closer to the 30 mark per baby. You might also want to make sure you have an extra-large diaper pail to accommodate the extra diapers (or two pails in two different locations…. feel free to be creative.) From talking to parents of multiples, we've learned that often twins (or more) are more on a routine schedule and may eat more regularly (ie every three hours) which helps to predict diaper changes more easily.
We also recommend choosing diapers that are easy-to-use and easy to have ready for diaper changes, just to keep life extra easy and to be extra nice to those who are giving you a hand with the extra baby care!
If you want a diaper that goes on in one step and doesn’t need a separate cover, check out  So, perhaps you’re new to cloth diapering or even just starting to consider it, or perhaps you’ve been using cloth for years but want some new ideas for your washing routine. Either way, washing isn’t what it used to be – it’s fast, it’s easy, and in most situations you never even have to touch the dirties. (Unlike the grandmother in our picture, who undoubtedly spent hours with her hands in the wash bin to get her diapers clean and white…)
There are
So, perhaps you’re new to cloth diapering or even just starting to consider it, or perhaps you’ve been using cloth for years but want some new ideas for your washing routine. Either way, washing isn’t what it used to be – it’s fast, it’s easy, and in most situations you never even have to touch the dirties. (Unlike the grandmother in our picture, who undoubtedly spent hours with her hands in the wash bin to get her diapers clean and white…)
There are  Ewwwww, no one wants a stinky room! Dirty diaper storage should most def not make your house stink like an outhouse.
There are two things that you can do to virtually eliminate any lingering smell in your pail. It keeps the smell down, really cleans the diaper pail, it's quick and non-toxic.
The two part system involves using a diaper pail liner (which many of you already use) AND giving your pail a quick wipe every time you take the diapers out to launder them.
What do you need?
Ewwwww, no one wants a stinky room! Dirty diaper storage should most def not make your house stink like an outhouse.
There are two things that you can do to virtually eliminate any lingering smell in your pail. It keeps the smell down, really cleans the diaper pail, it's quick and non-toxic.
The two part system involves using a diaper pail liner (which many of you already use) AND giving your pail a quick wipe every time you take the diapers out to launder them.
What do you need?


